Seasonal Pruning for Size Control
After reading my last post, you may have been left with a burning question “don’t different trees and shrubs get pruned at different times of the year?”
The answer is yes, BUT… (and you knew that ‘but’ was coming didn’t you?) in the last post we were only discussing the removal of undesirable branches- ones that should be removed to promote good health and proper structure of our trees and shrubs. We were not discussing routine pruning for size control or rejuvenation of our plants. For this type of pruning the timing is everything… so let’s start that discussion here!
Old Wood vs. New Wood
To understand pruning times, we must first discuss the type of wood that trees and shrubs will bloom on. Let’s start with the seemingly not-so-straightforward woody plants: the ones that bloom on old wood. In these plants, flower buds were set last season and it is those buds that will bloom this year. Many of our showiest landscape plants (such as magnolias, serviceberries, dogwoods, lilacs, and rhododendrons) fall into this category, and if you look around the neighbourhood (while social distancing of course), you can often see these buds getting plump and ready for their floral frenzy.

Flower buds on a Cornus kousa (Kousa dogwood) getting ready to pop!
So what happens when you go crazy and do a size-reducing spring prune on these spring-blooming beauties? You remove all their flower buds! (The horror!) So leave these plants alone! In general, these trees and shrubs get pruned right after their bloom period has wrapped up- which also happens to be before they start setting their buds in preparation for next year’s show. So, at this point in the season, we only remove the undesirable branches. Yes, you will sacrifice some blooms by doing this, but don’t forget this is for the health and structure of the plant… we leave the size control (if necessary) for later in the growing season.
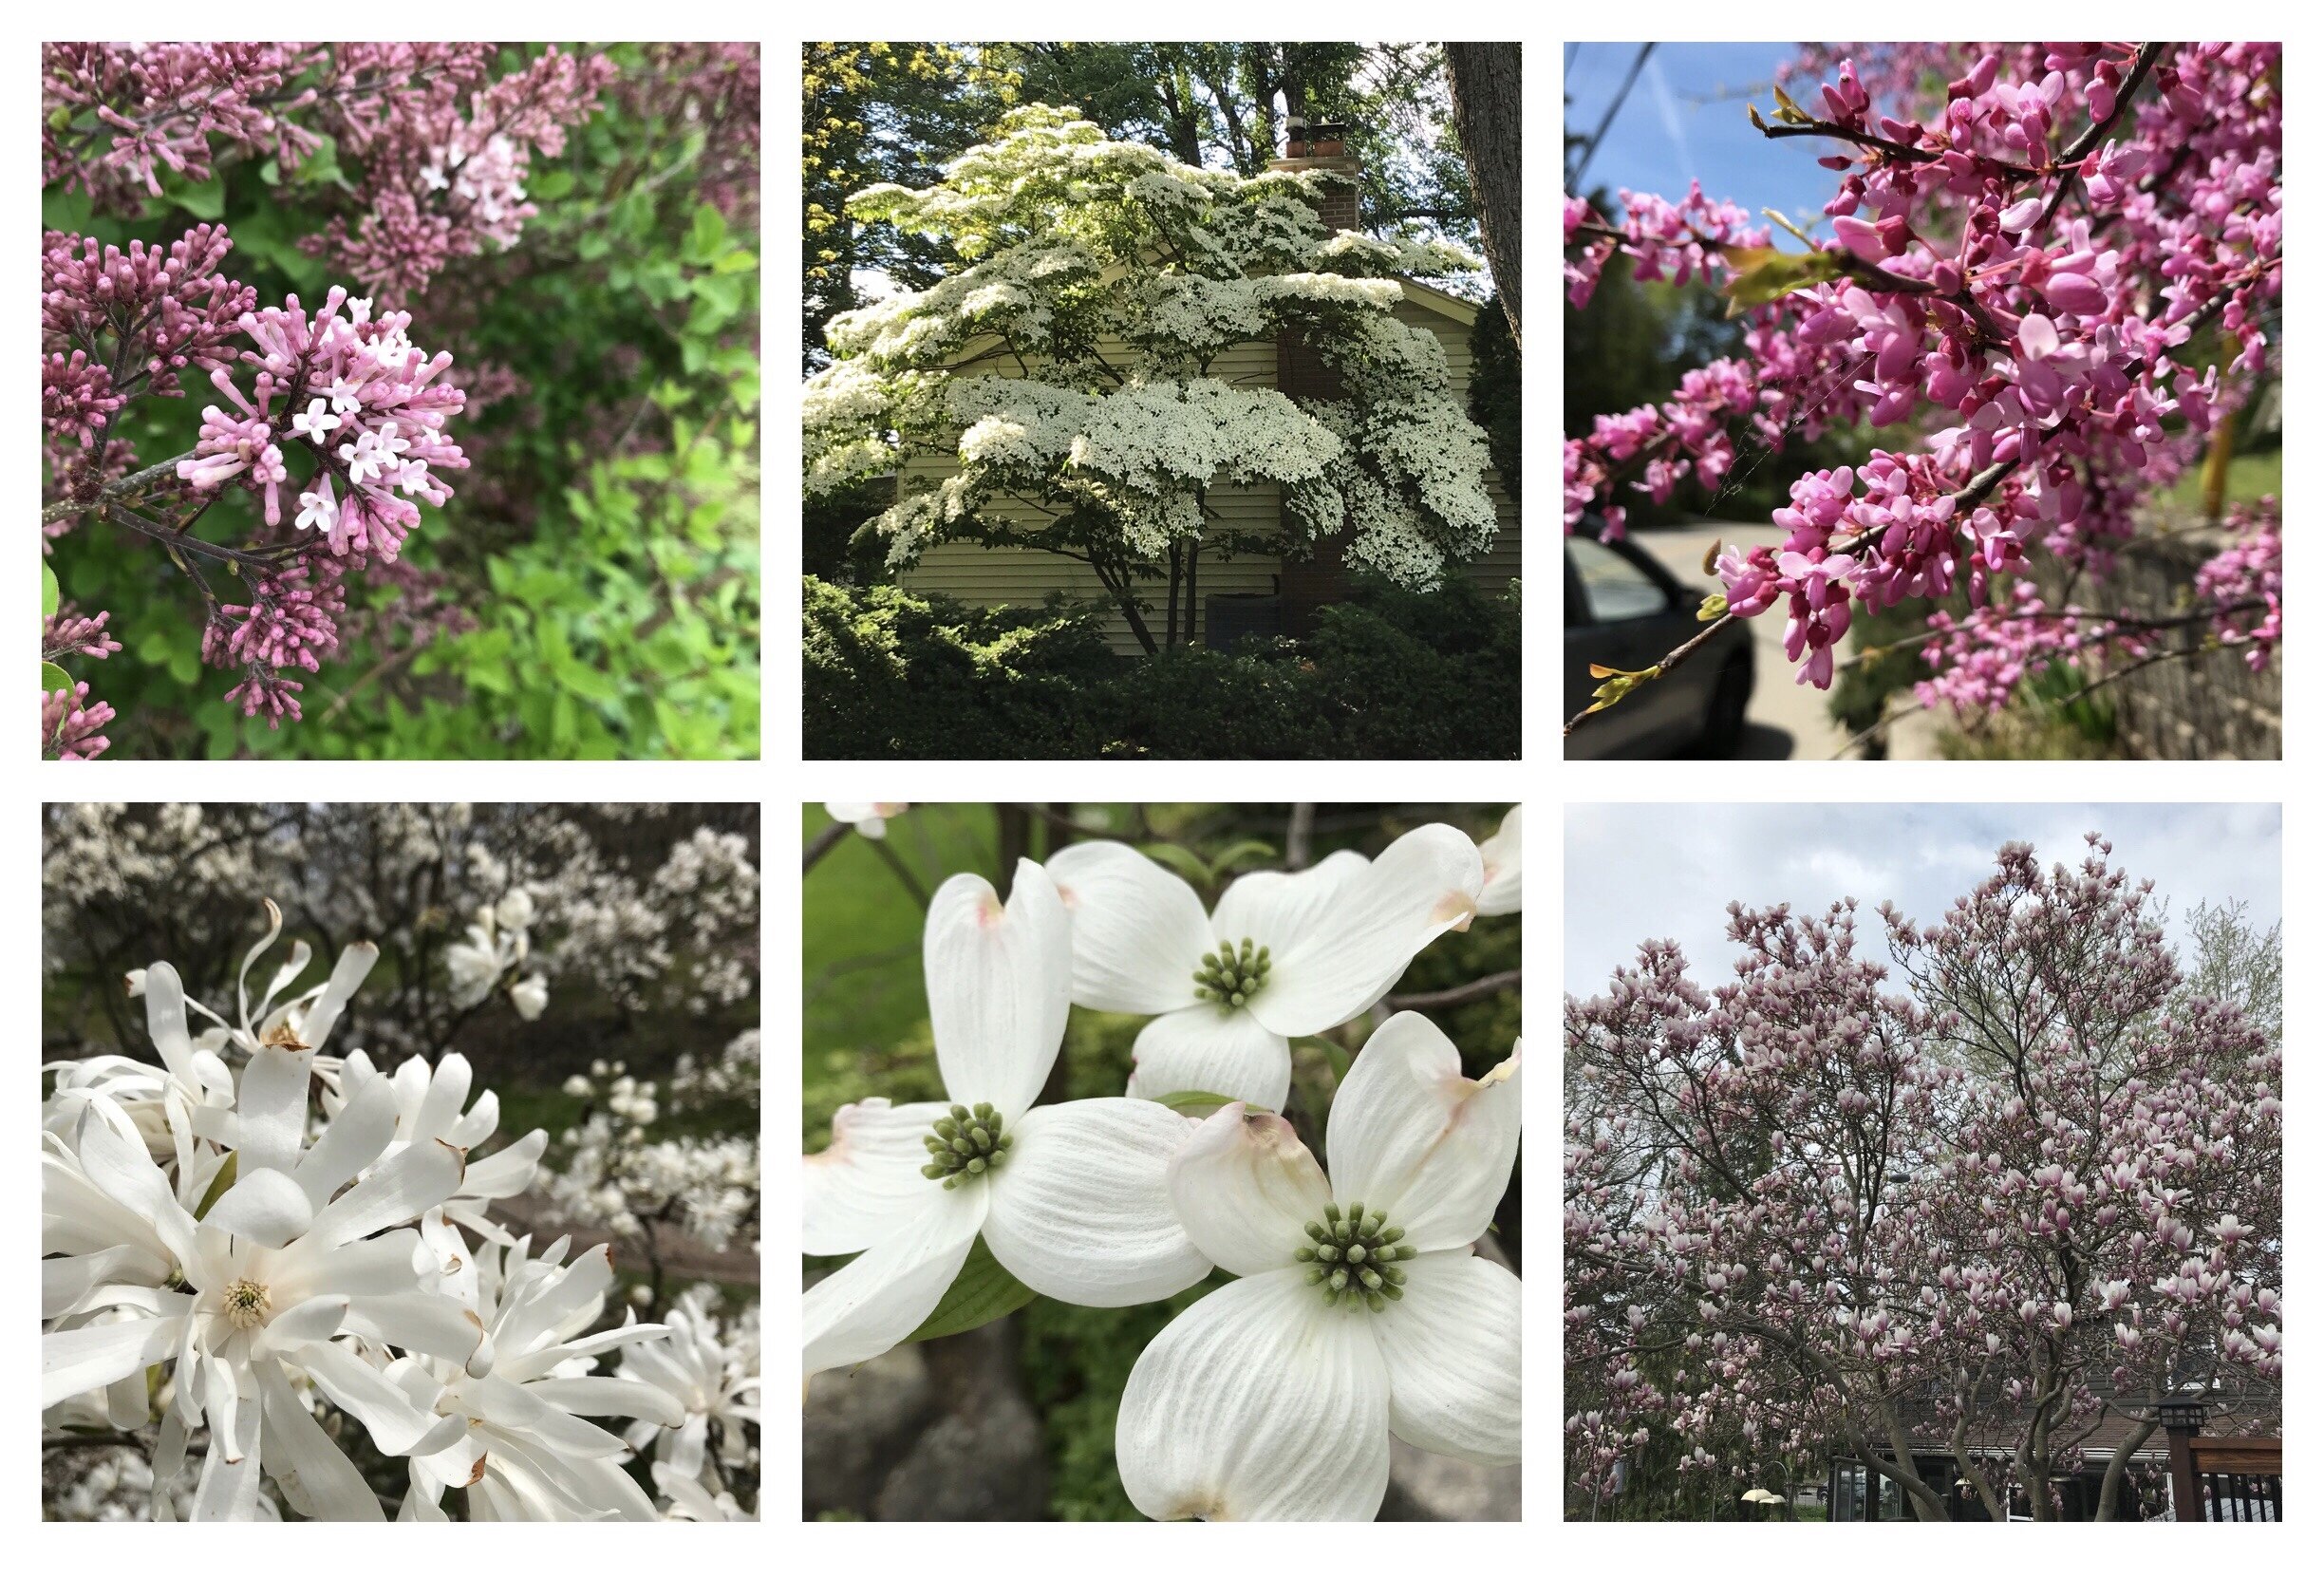
An assortment of spring beauties- none of which are pruned until after their flower show (if pruning is necessary)!
OK. So the hard part is over (phew). Let’s move on to the easy plants: trees and shrubs that bloom on new wood. These plants set their buds and bloom on those buds during the same growing season. Because these plants have quite the ‘to do’ list to accomplish before they can actually show-off their blooms, these plants are generally summer-flowering (at the earliest). For these trees and shrubs, the time to prune is now! Seize the day and prune away! No time like the present… OK you get the picture. Some common examples of these plants include:
Hydrangea arborescens (such as the common ‘Annabelle’ hydrangea); shown below
Hydrangea paniculata (such as the common ‘Grandiflora’ or Pee Gee hydrangea)
Buddleia spp. (butterfly bush); shown below
Caryopteris incana and Caryopteris x clandonensis (bluebeard); shown below
Hibiscus syriacus (rose of Sharon)
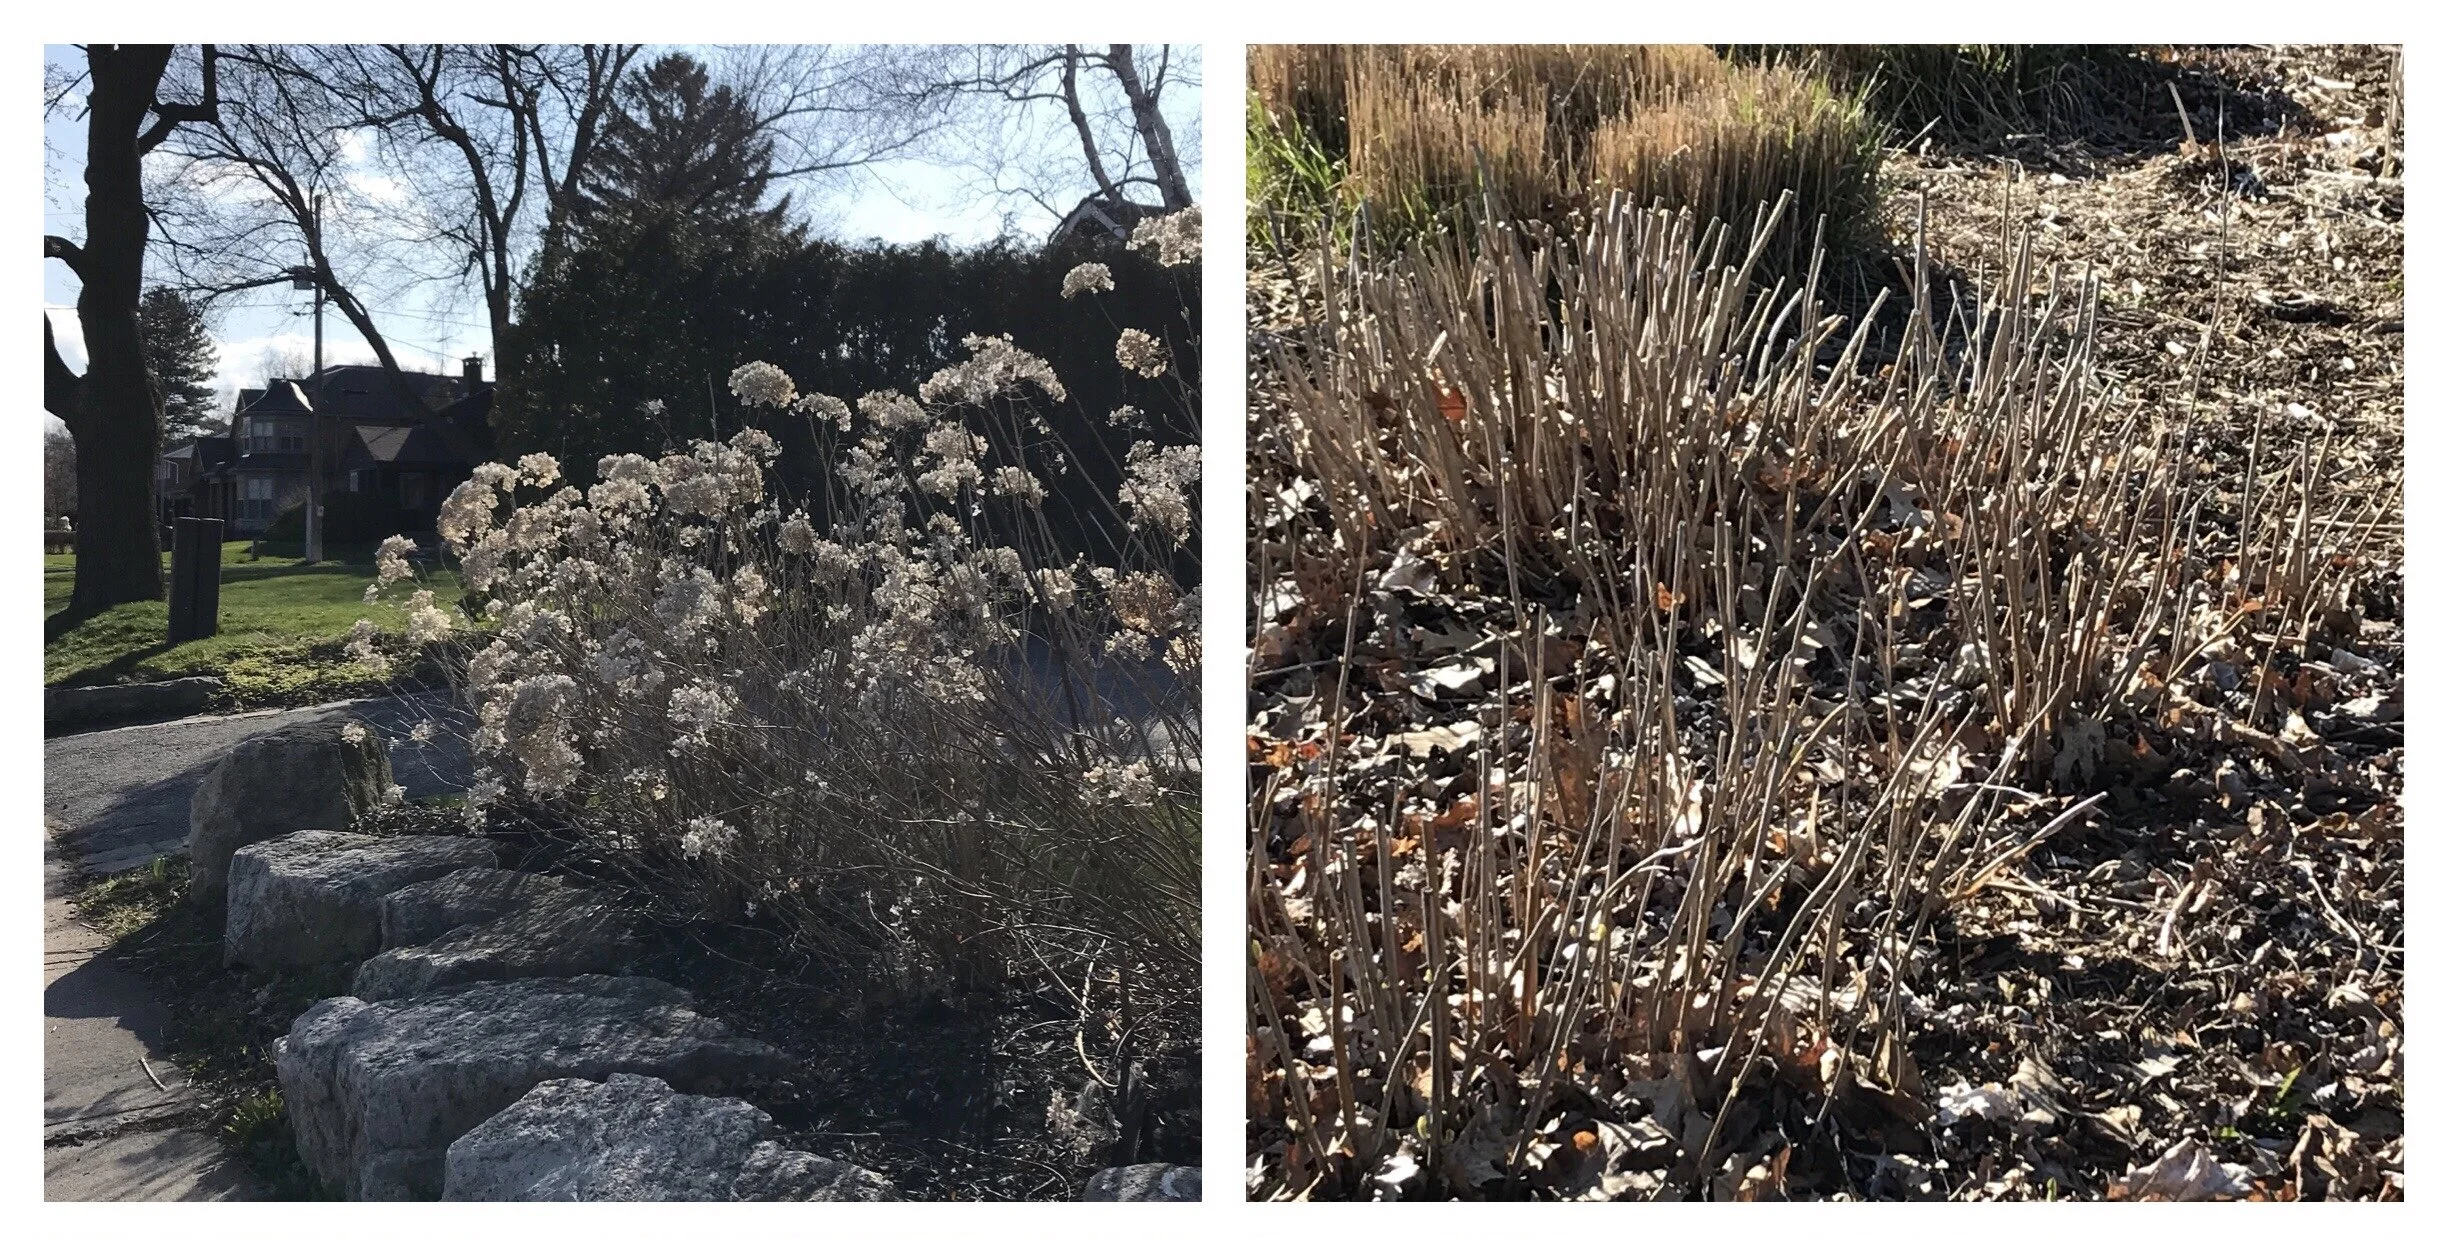
Hydrangea arborescens still standing in the spring with it’s pretty dried flowers that provided some interest in the garden over the winter months (left) and another patch of H. arborescens that has been cut down for the spring (right, foreground). This patch is located in a common area so tending to these plants is not really an option for me, but if it were, I would be inclined to prune these shrubs back even further- cutting each stem just above a pair of buds located 10-20 cm up from ground level (oh, and I would remove all the leaves caught up in the base of the plants too!)

A Buddleia (butterfly bush) before and after pruning. Yes they get pruned HARD; pruned down to about 20-30 cm (8-10 in) with all weak growth removed. The photo on the right shows the shrub after some additional branches were removed to achieve a more uniform distribution of branches.

Spring pruning of Caryopteris incana ‘Jason’ (Sunshine bluebeard). Shown during it’s glory days last season (top left) and the same patch after spring pruning (top right)- not much left to see! The best way to tackle this shrub, in my opinion, is to grab a handful of branches and cut the whole thing down by half (bottom left); this removes bulk and allows you to ‘see into’ the shrub better so that the strongest stems can be selected to remain; old, weak, and dead stems can then be pruned out until you are left with a simple branching framework. The plant can then be taken down to a height of 20-30 cm (8-12 in) tall (bottom right).
And there you have it! Hopefully these last two posts have helped shed some light on the various goals of spring pruning. I will continue to provide more examples of pruning in future posts.
It’s now time to head back to the garden, secateurs in hand, and get to work on all those woody plants that flower on new wood.
Have fun and happy gardening!


